If your photos are wet right now
Time matters. Wet photos start sticking together within hours, and mold can begin in a couple of days. Conservation guidance agrees on a few steps:
- Handle them gently, by the edges. A wet photo's surface is soft and scratches easily.
- Separate prints that are not yet stuck. If they are stuck, do not force them apart.
- Rinse off mud and dirt in clean, cold water if needed. Do not rub the surface.
- Air dry face up on a clean towel or paper towel, in a cool room with a fan moving the air. Do not use a hair dryer, an oven or direct sun.
- If you cannot dry them within a day or two, put them in a zip bag and freeze them. Freezing stops the damage until you are ready to deal with them.
Photos already stuck in a solid block are best left for a conservator, or soaked in cold water until they release on their own. Never pull them apart dry: the image layer tears off.
What water leaves behind
Tide lines and brown stains. Water dissolves dirt and old paper fibers and carries them to the edge of the wet area, where they dry into a brown line. This is the most common water mark on old family photos.
Stuck or lifted areas. Where a print stuck to glass, another photo or an album page, part of the image surface may have come away.
Mold and mildew spots. Small dark or fuzzy spots, often in clusters, from storage in damp places.
Cloudy or dull patches. The gelatin surface of the print swelled and dried unevenly.
Curling and cockling. The print dried in waves.
A water stained photo, restored
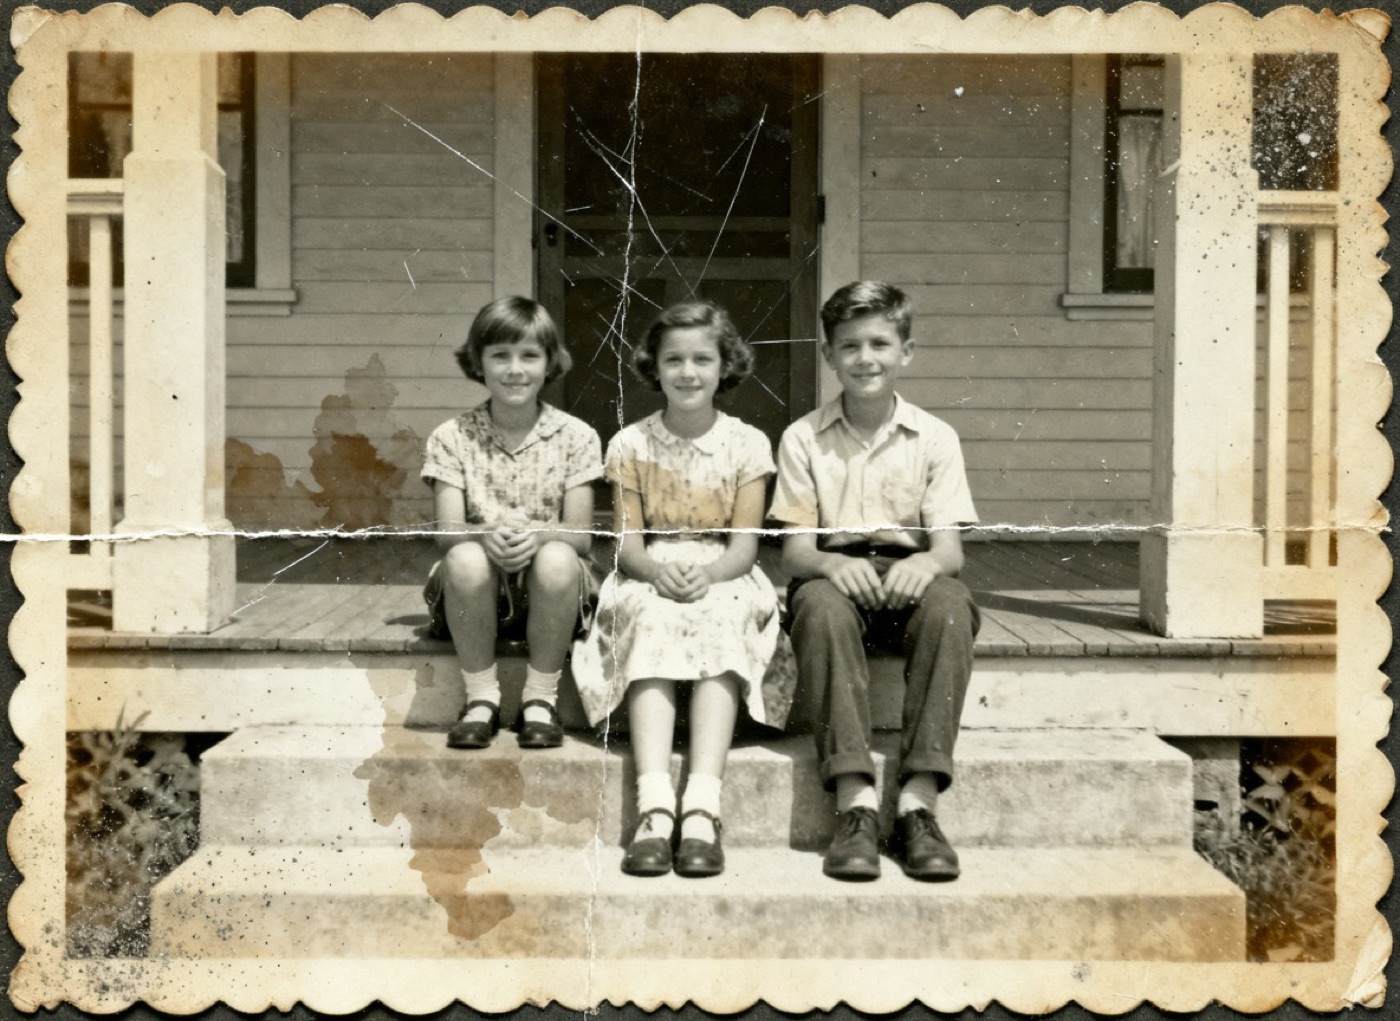
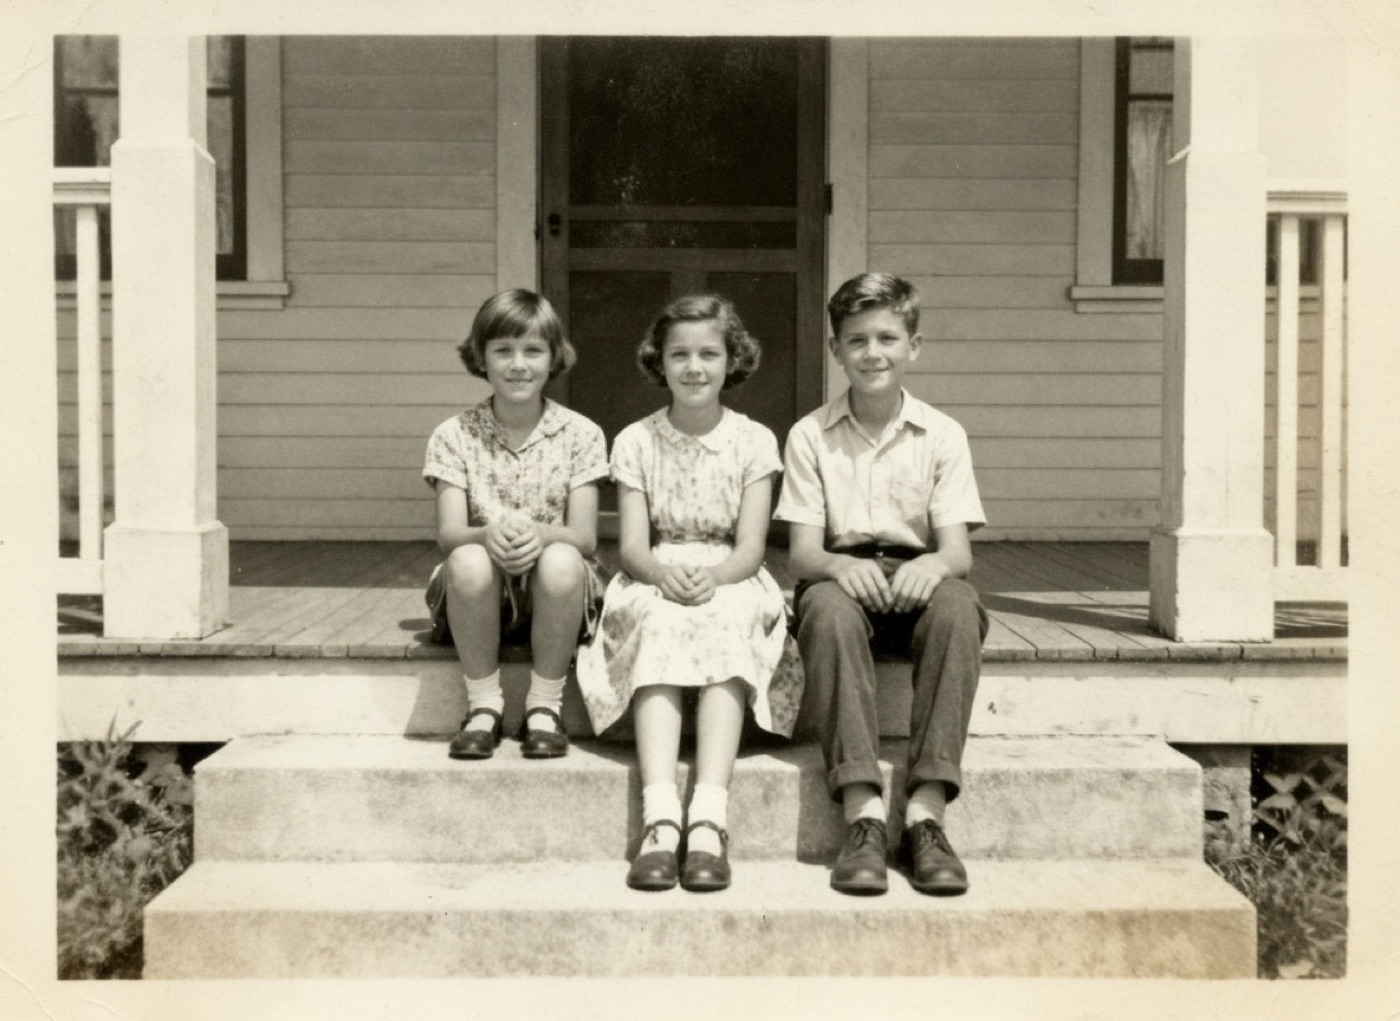
Porch steps, about 1953. Water stains removed. Scratches cleared. Faded contrast restored.
This snapshot of three children on porch steps, from about 1953, had brown water stains across the steps, fine scratches on the door and faded contrast. The restored version removes the stains, clears the scratches and brings the contrast back, while keeping each child's face exactly as it was.
Photographing a water damaged print
Do this only once the photo is completely dry.
- Flatten it first. Place a curled print between sheets of clean paper under a few heavy books for a day or two. Do not iron it.
- Use soft daylight, no flash. Water damaged surfaces are often uneven and shiny in patches, and flash makes the glare worse.
- Shoot from directly above, phone parallel to the print, filling the screen.
- Do not clean the surface with water or cleaners. A soft dry brush can remove loose dust.
If the print stuck to the glass of a frame, do not try to peel it off. Photograph it through the glass and send that copy. Our guide to scanning old photos covers lighting and glare in detail.
What restoration can do
Restoration removes tide lines, stains, spots and dull patches, rebuilds small areas where the surface lifted, and corrects the fading that usually comes with water damage. Our faded photos guide explains that part. If a large part of the image washed away completely, that area can only be filled to blend with its surroundings; faces and people are never changed or invented.
You choose black and white or color, see the restored photo before you pay, and the print arrives in a protective sleeve with a backing board.
Keep the rest of the box safe
Water damage rarely happens to just one photo. If one print in a box is stained, check the others, move the whole collection to a dry room, and replace damp envelopes and boxes. Our guide to storing old photos explains what kind of storage keeps humidity and mold away.
Send a scan or a phone photo of the print. See the restored result before you pay.
Restore a water damaged photoUpdated October 8, 2026